Create a Pixelate Asset
- From a model (recommended): select models, prefabs or particle prefabs in the Project window and choose Assets > Create > Pixelate > Pixelate Asset. Each new asset is framed, has its clips added and a Style Profile linked. See Quick start.
- Empty: choose Assets > Create > Pixelate > Pixelate Asset, then assign a Source.
The Inspector at a glance
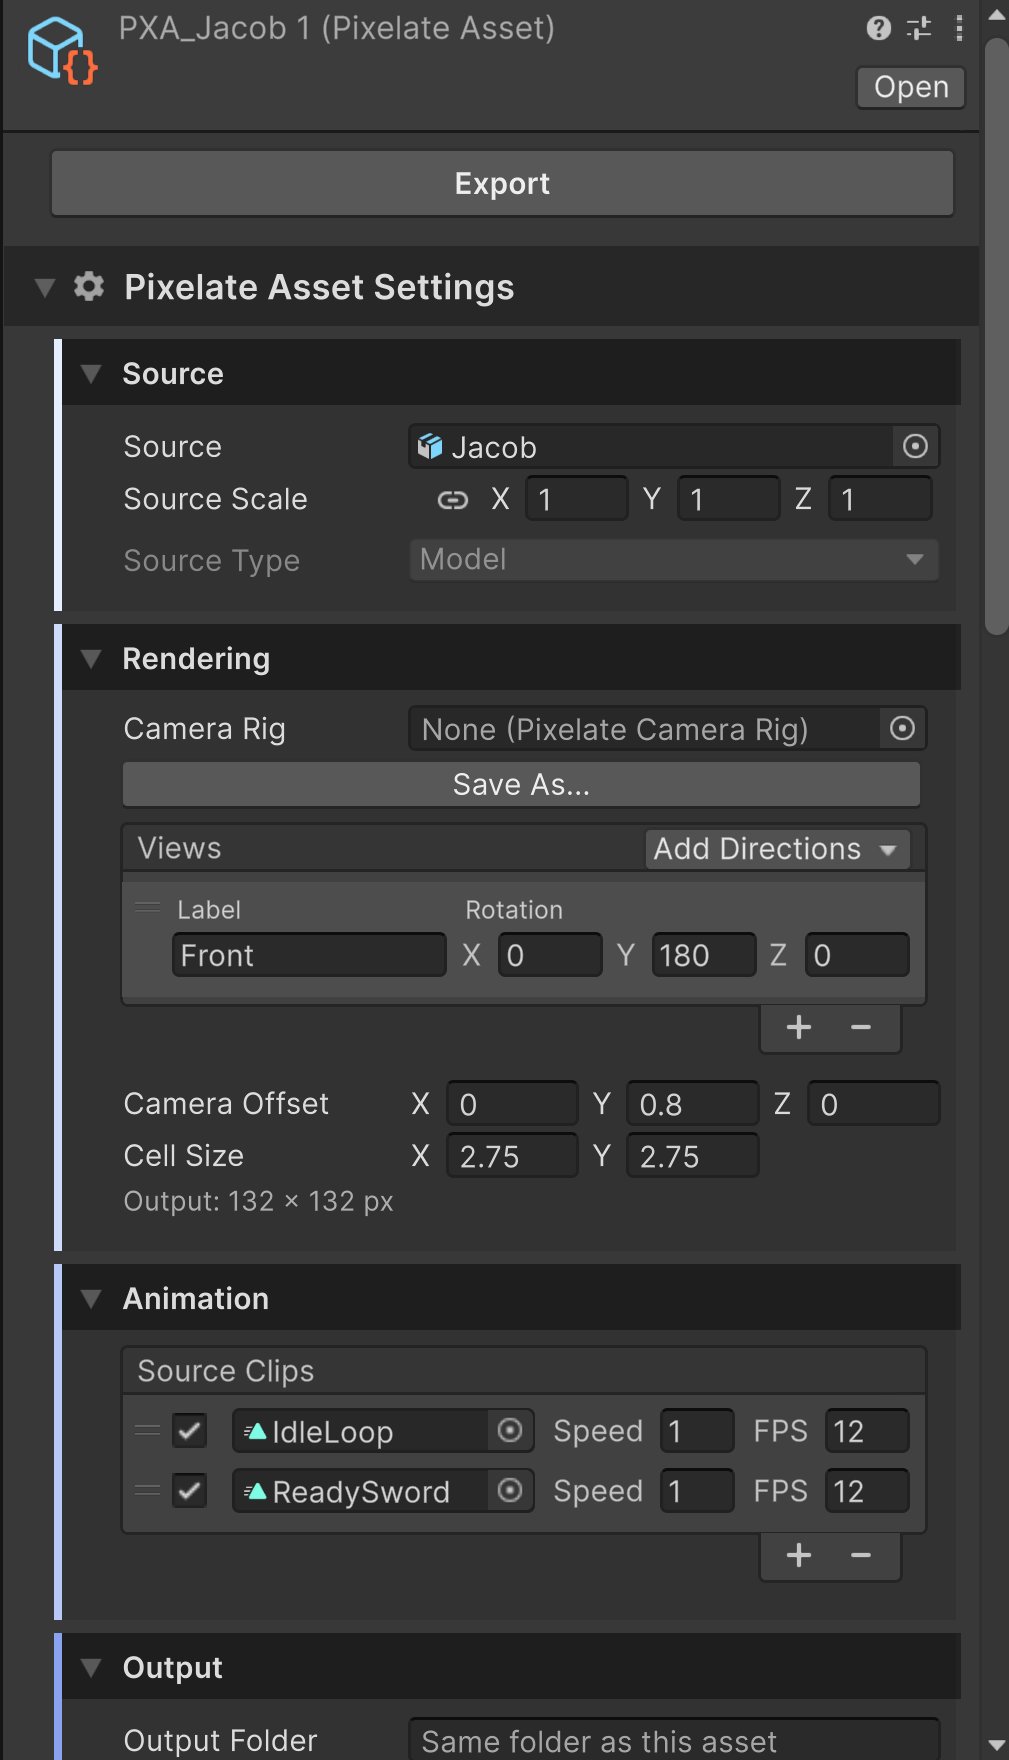
- Export, which writes the sprite sheets. Messages about the export, and anything that blocks it, appear right under the button.
- Pixelate Asset Settings, with the sections Source, Rendering, Animation (or Particle Settings) and Output. Until you assign a Source, only the Source section shows.
- The Style Profile slot and its effects. See Style Profiles.
- The Preview, at the bottom of the Inspector. See Preview.
Source
Pixelate Pro renders your source with its own materials. It never replaces or edits them.
An Animation Clip is not a Source. Assign the model or prefab as Source, then add the clip under Animation.
Rendering
Rendering decides what the capture camera sees and how big each sprite is.Cell size and pixel size
The grey Output line under Cell Size shows the sprite size in pixels: Cell Size × Pixels Per Unit (Pixels Per Unit is set on the Style Profile). For example, a 2 × 2 cell at 48 PPU gives
Output: 96 x 96 px.
Camera views and directions
Views is the list of camera angles to capture. Each view exports its own sheets and is named after its Label.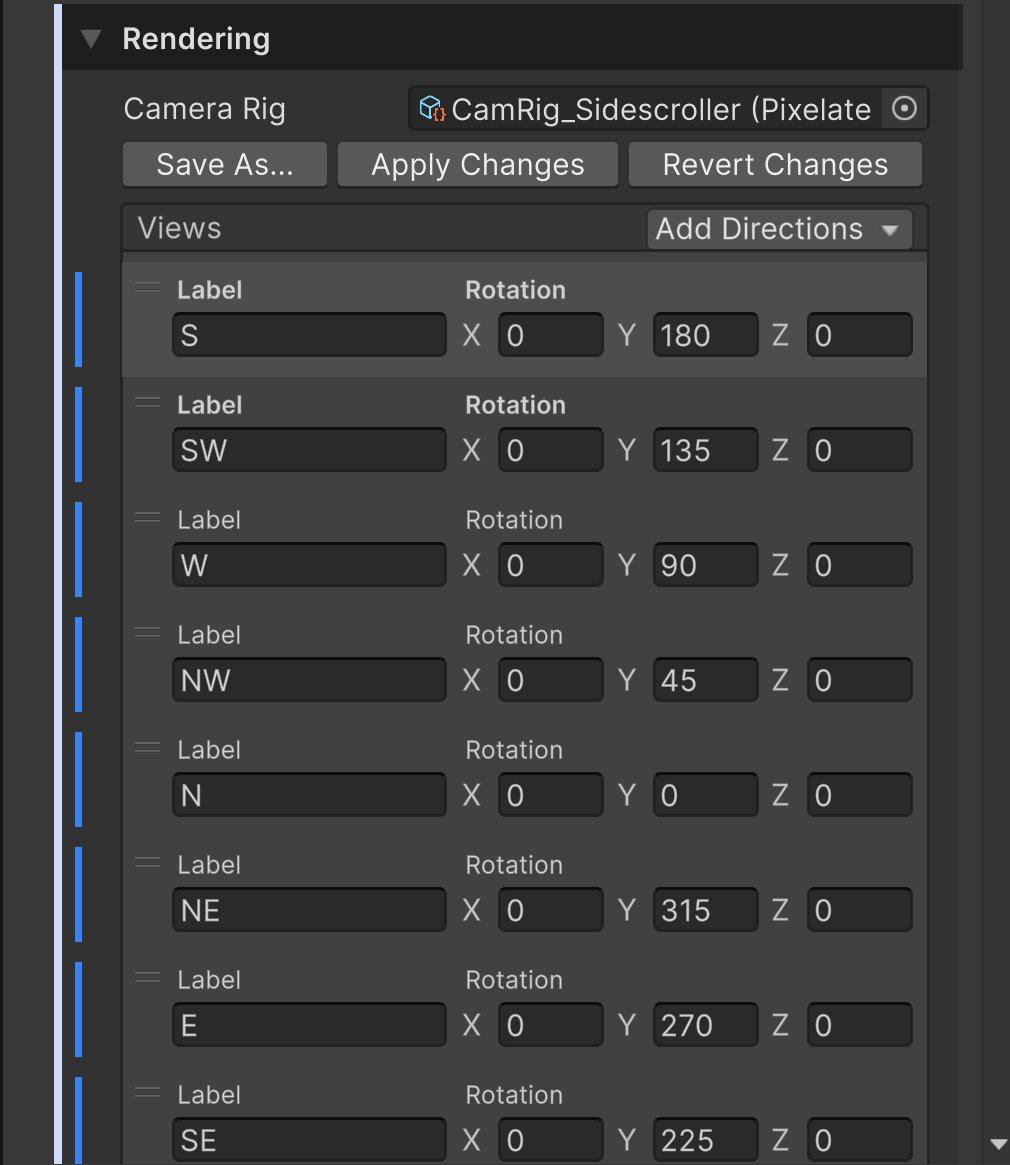
- 4 Directions: S, W, N, E
- 8 Directions: S, SW, W, NW, N, NE, E, SE
- 16 Directions: S, SSW, SW, WSW, W, WNW, NW, NNW, N, NNE, NE, ENE, E, ESE, SE, SSE
{Label}_2; rename one of them to choose the name yourself.
Shared Camera Rigs
Views live on the asset by default. To reuse the same views across many assets (for example every 8-direction character), save them as a Camera Rig asset:- Save As… saves the current views as a new Camera Rig asset and links it.
- Camera Rig links an existing rig. You can also create one with Assets > Create > Pixelate > Pixelate Camera Rig.
- With a rig linked, edits you make to the views stay local to this asset and are marked in blue. Apply Changes writes them back to the rig (every asset using it gets them). Revert Changes returns to the rig’s views.
Animation
Shown for models and prefabs. Source Clips lists the animation clips to capture. Each enabled clip exports its own sheet per camera view. Leave the list empty to capture a single still frame.Particle Settings
Shown for particle prefabs. The number of frames follows the particle system’s duration.Output
Output decides where files go and what Export creates besides the sprite sheets.
A grey line under File Name shows the exact folder, for example
Exports to Assets/Characters/Knight/.
File layout
Particles_{seed} in place of the clip name, and still sources use Static. Exports always stay inside your project’s Assets folder.
Each sheet is imported as a Sprite in Multiple mode and sliced on a fixed grid. Every frame of a sheet has the same size and the same pivot, so sprites never jitter between frames. Filtering is Point when the profile’s Pixelated option is on, and Pixels Per Unit comes from the profile.
Pivot

- Center: the middle of the cell.
- Bottom Center (Feet): the point where the source stands, so characters line up with the floor in every view. Particle effects use the bottom of the cell.
- Custom: set the pivot yourself as a fraction of the cell. (0, 0) is the bottom-left corner, (1, 1) the top right. Switching to Custom starts from the pivot the previous choice produced, so nothing jumps.
Animation Clips, Animator Controller and Sprite Library
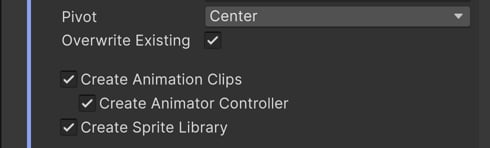
Create Animation Clips
Create Animation Clips
On by default for animated sources. Export writes one
.anim per camera view and clip, next to its sheet. It plays the sheet’s sprites on a SpriteRenderer at the clip’s FPS and loops when the source clip loops. Export again to update the clips in place; references to them, and events you added, stay intact.Create Animator Controller
Create Animator Controller
Shown under Create Animation Clips when the asset has more than one clip or camera view. Off by default. Export writes
{File Name}.controller with one state per clip, starting in the first clip. With several views, each view gets a sub-state machine named after it. No parameters or transitions are added. Export again to update the states; transitions and parameters you add are kept.Create Sprite Library
Create Sprite Library
Shown only when the 2D Animation package is installed. Off by default. Export writes
{File Name}_SpriteLibrary.asset. Each clip and view becomes a category named like its sheet ({Clip}_{View}, for example Run_S) and each frame a label (0, 1, 2, …), so a Sprite Resolver can swap direction and frame at runtime.Normal maps for 2D lights
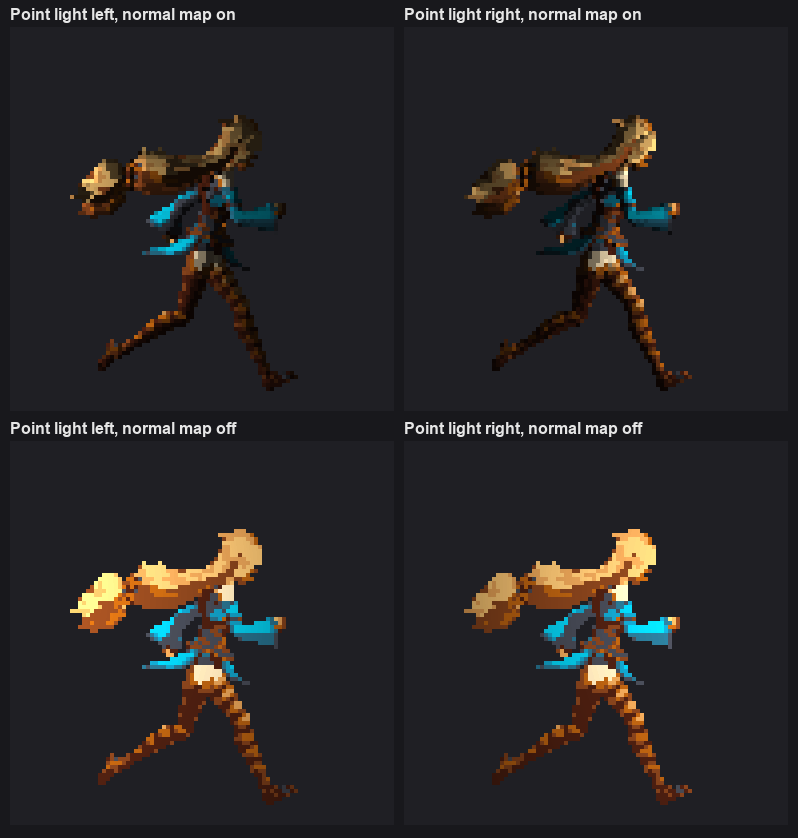
When the Style Profile has a Lighting effect with Export Normal Map on, Export also writes a normal map for every sheet into aNormals folder. Each normal map is linked to its sprite sheet as the _NormalMap secondary texture, so the sprites react to URP 2D Lights with no extra setup.
Reuse settings with Presets
Unity’s Preset button (the slider icon at the top of the Inspector) saves an asset’s general settings, such as Cell Size, Camera Offset, camera views, Output options and the linked Style Profile, as a.preset. Apply it to other Pixelate Assets to start them the same way. Presets never copy the Source, Source Scale, clips, particle settings or Style Profile overrides. The Samples folder includes ready-made presets (Side-Scroller Character, 8-Direction Top-Down Character, Prop, VFX) that set only the camera views, pivot and generated outputs.